How To Create an Application in Reify

Let’s build a mini-application that includes all CRUD operations and database actions, sizing, sorting, validations, and workflows
In this blog, we’ll show how easy it is to create a simple fully working application, export the project you have created and run it in your own environment.
So let’s get building!!!
First, let’s add some DataSources. The two attached text files hold the data we need for our Tree, Grid and Form. So to start, download these to your local device by clicking on each one.
Let’s Create the DataSources
Access the DataSource functions, by selecting
Add > New DataSource >Upload or Enter Data
In the window that displays, create your DataSources one at a time.
Give the DataSource a name that relates to the one you are going to create (such as SupplyCategory). The import type defaults to CSV, so just
- Click “Browse”
- Select the SupplyCategory file that you downloaded earlier
- Click “Import”
- Click “Create DataSource” to see it create your first DataSource.
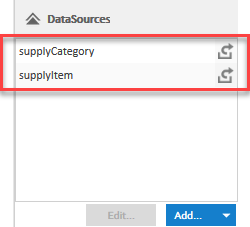
Repeat this process for your other downloaded file and we now have 2 DataSources, which you can see in the DataSources section in the main Reify screen.
The last thing we need to do is set the keys and relationships for the DataSources, so they can communicate with each other.
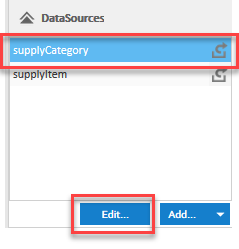
In the DataSources section, click on SupplyCategory, then select Edit.
On the following screen, select Edit Fields and Data Separately and confirm this is what you want to do when you get the warning. You will then be able to manipulate the fields.
Select “CategoryName” as a the primary Key and once it has allocated it, remove the “internalID” field from the DataSource definition.
Now click on the Relations button. Because this is a self-relating dataset (also known as a Tree), we need to tell it how to relate the data in the DataSource .
Select Add New Relation, from the Related DataSource dropdown, select “tree via self-relation” and then select parentID from the dropdown on the Stored As field click Add Relation, then Save. Finally, click Save on the DataSource and we have now created our Tree of data – simple!!!
We now need to set a foreign key relationship for the SupplyItem DataSource to define the link between it and the SupplyCategory DataSource.
As with the above process, select the SupplyItem DataSource from the Main screen and click Edit, Edit Fields and Data Separately, confirm, and finally click Relations.
This time we are going to link the SupplyItem field Category to the SupplyCategory Field CategoryName.
Select Add New Relation, from the Related DataSource dropdown, select SupplyCategory, then select “Each “supplyCategory” record may have multiple “supplyItem” records (many-to-1)”. In the Stored As Field use the dropdown to select Category and Click Add relation, then Save. Finally click Save on the DataSource and we have built the foreign key relationship ready for our filtering when we click a record in the tree.
We’re now ready to build the application!
- In your main Reify screen, drag a TriplePane component onto the Edit Panel.
- Add a TreeGrid to the left hand Navigation Section and bind it to the SupplyCategory DataSource we created earlier.
- Add a ListGrid to the List section of the Navigation Panel and bind it to the SupplyItem DataSource we created earlier.
- In the ListGrid properties tab, set Can Remove Records to true and Show Filter Editor to true.
Add a Table Layout Form to the Detail section and bind it to the supplyItem DataSource.
Add two Buttons to the form, name them “Save” and “Add new”. Set the
Start Row to true and End Row to false on the “Save” Button and the Start Row to False and End Row to True on the “Add New” Button so they appear on the same row.
We have now built the data components needed for our mini-app. It really is that simple!
Now we just need to make sure each component talks to the others.
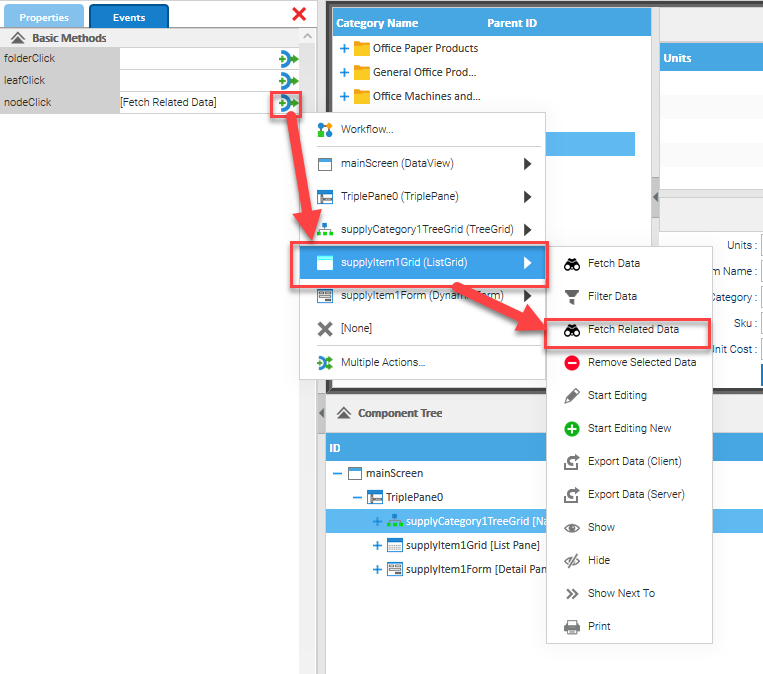
- Click on the TreeGrid and select the Events tab->Node Click.
- Select SupplyItemGrid > FetchRelatedData for this Event.
- Now click on the ListGrid Events Tab->RecordClick and select SupplyItemForm > Edit Selected.

- Click on Save Button > Events Tab > Click and select Workflow.
- In the WorkFlow screen, select Form Tasks > Save Data, pick SupplyItemForm from the dropdown list (it will already have pre-selected it for you) and click Save.
- On the new Workflow Item (it is auto-created) set Widget Tasks > Set Notification with the message “Data Saved Successfully” and click Save.
- On the new Workflow item, set Form Tasks > Clear Values, select the SupplyItemForm from the dropdown list and click Save .
- Then Save the Workflow.
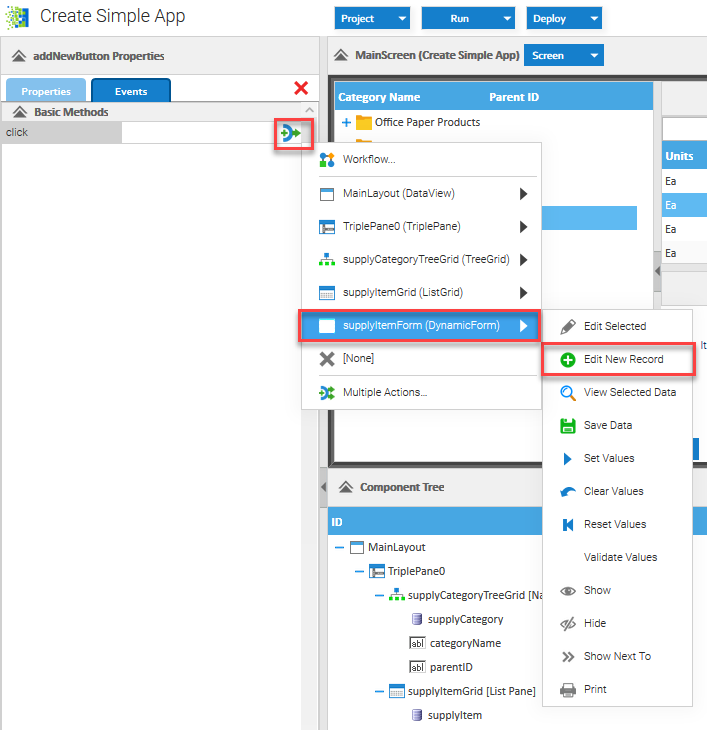
- Finally, click on the Add new Button > Events Tab > Click and select SupplyItemForm->Edit New Record.
And… we’re all done!
You now have a fully functioning mini-application that provides a tree of cascading supply Categories, linked by a record click to automatically filter the data in the supplyItem ListGrid, delete records from the Grid, or further filter the data.
Clicking on a record allows you to edit an existing record or add a new one in the form.
How long did that take? 15 minutes?
That’s the power of Reify!!!
Click Run from the main Reify screen to see it all in action.
This is just a taste of what Reify is capable of. Take a look yourself to see just how powerful and feature rich your future designs can be.
In our next blog post, we’ll discuss exporting your newly made project to an existing Smartclient / SmartGWT implementation to see how easy it is to get your Reify projects running seamlessly in your existing applications.
Get a demo of Reify
Experience a live demonstration of the Reify low-code platform customized to your specific needs!